1. Create Signup session to register user
At the start of your checkout, create a signup session by following the documentation that can be found here:
https://app.developerhub.io/payer---onboarding-docs/v1.0/payer/sdk
You need to associate the sessionId to your checkout (e.g. your cart or cartId) in order to connect future updates of the session to what the buyer is trying to checkout. This can be achieved either by storing the sessionId connected to your checkout in your own database or adding an referenceId to the session that connects it to your checkout.
Use the clientToken you received to initiate the signup-widget according to the documentation. When you have initiated the widget an iframe will appear that guides the user through the signup flow and ends with a frontend callback with the result of the signup. This result contains an overall status of the signup session, a credit decision result and information about the signed up user and company. Directly after the signup has been completed you will also receive a backend callback, more on that in step 5 in this documentation.
If the outcome of the signup results in one of the following session-statuses, COMPLETED, PENDING or MANUAL_CONTROL the user can proceed to the next step of the checkout. It is not required to lock the checkout based on this criteria but it helps the user to get a guide through the checkout experience.
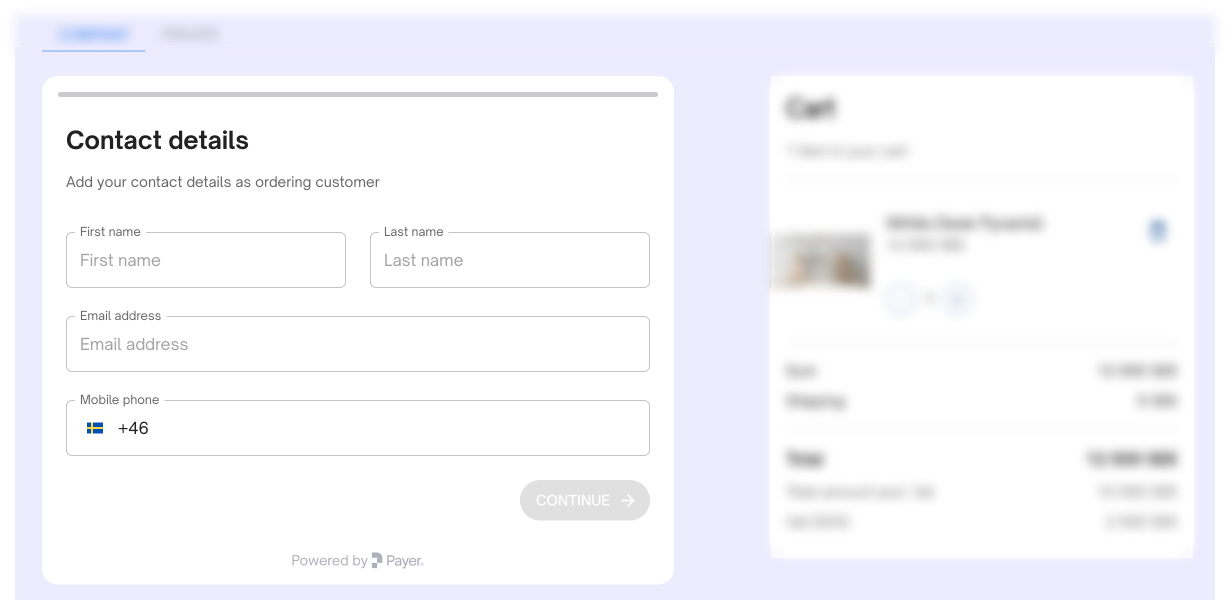
Example of a Checkout Implementation and the first step in the widget for a new (or not yet identified recurring ) user.
2. Select payment methods
Payer offers different payment methods and you choose which payment methods you want to provide to the user. Read more about each payment method here.These methods come with a set of recommendations of criterias to use when deciding whether to show each payment method to a specific customer or not in the checkout.
Recommended criterias
Normal invoice
Make the Invoice payment method selectable to the customer if the credit decision from the signup session is approved and the session status is Completed or Pending. This means that the customer has passed all the verifications and is approved according to the credit template to buy with credit.
If the credit decision from the signup session is Control, you may want to present the payment method to the user but not approve the order until the decision is changed to approved. Note that you will receive a callback when the credit decision is updated and you will need to notify the customer.
Prepaid invoice
Give the users the possibility to choose Prepaid invoice as a payment method regardless of the credit decision from the signup session.
Card
Give the users the possibility to choose Card as a payment method regardless of the credit decision from the signup session.
Swish
Give the users the possibility to choose Swish as a payment method regardless of the credit decision from the signup session.
Open Banking
Give the user the possibility to make a cheaper and more instant alternative to card payments. It is a secure way to share financial information and make secure payments thanks to PSD2.
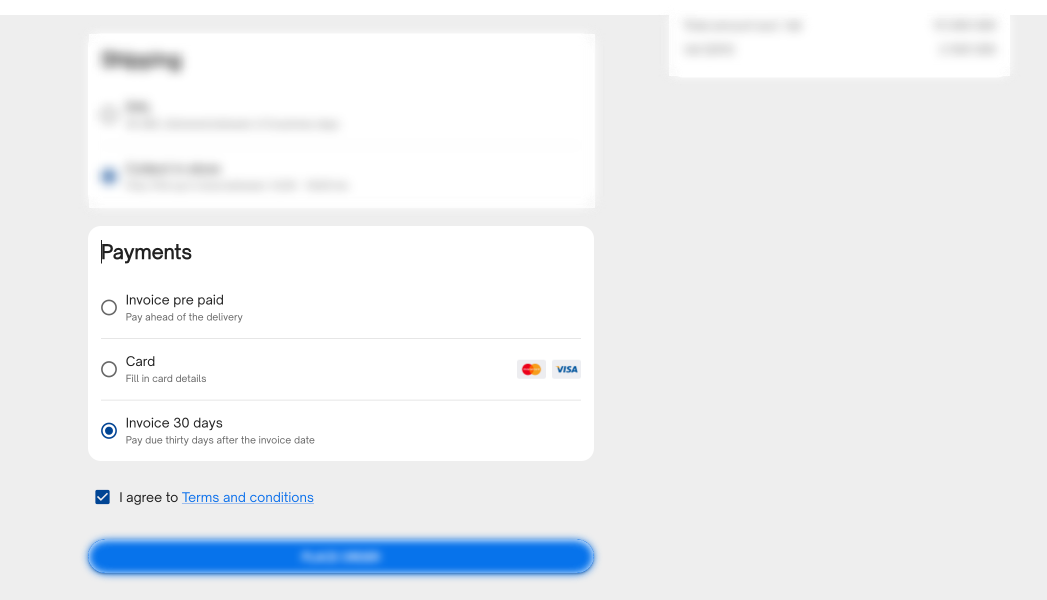
Example of a Checkout where a Merchant decides to offer three payment methods for the user that was eligible for credit; Prepaid Invoice, Card Payment and Invoice (30 days). You decide what payment methods you want to offer in your solution.
3. Create card payment
If you have opted in for card payments and the user selects the card-payment payment method follow the documentation that can be found here: https://payerdocs.developerhub.io/payer-docs/card-payment-sdk-v2
Use the clientToken you received to initiate the card payment.
Make sure to save the paymentId you get from the call because it will be used at the end of the checkout to capture your payment.
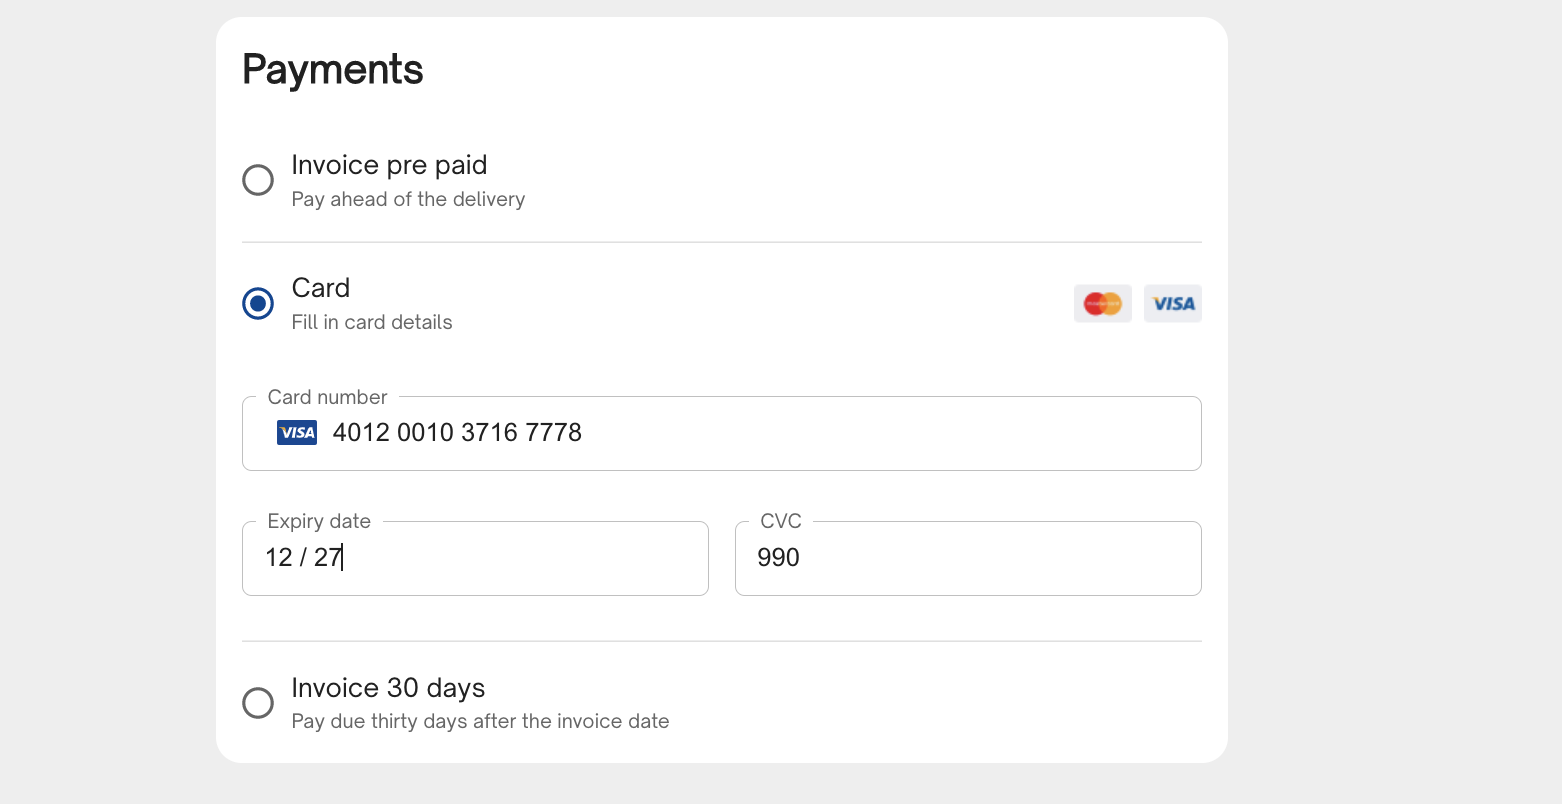
Example of a Checkout with Card Payment method integration via Card Payment SDK V2
If you show the card payment widget or hosted fields while being able to change the total amount of the payment, e.g. if the items in the cart or shipping options is changed, the card fields will be cleared. This is because a new payment needs to be initiated if the total amount is updated. If you don't want that behavior, all fields that can change the total amount of the order needs to be locked once you proceed to the payment options step of the checkout or you can add a payment step after the checkout is completed.
4. Complete checkout
To finalize the checkout, different things need to be done based on what payment methods that are selected, but the first step is to create an order.
https://payerdocs.developerhub.io/payer-docs/creating-an-order
You need to connect your order to the checkout (i.e. your cart or cartId), this can be achieved by storing the order id on your checkout object or adding an referenceId to the order that connects it to the checkout.
After the order is created the following needs to be done for each payment option.
Invoice or Pre-paid invoice
If the signup session status is COMPLETED, approve the order and create an invoice (more details can be found in step 5 that follows the same logic). If the status is PENDING or MANUAL_CONTROL the approval of the order and creation of the invoice invoice will be done later when the onboarding session sends its callback with the updated status COMPLETED.
Card
When the payment method is selected as Card the order can be directly approved and the payment with the previously stored paymentId can be captured.
5. Handle Signup session callback
In the case that the signup session status was PENDING or MANUAL_CONTROL, when completing the checkout, a callback will be sent every time something updates on the session until its completed. When the status of the session is COMPLETED that correlates to the order and the order is in status NEW the order should be approved:
[https://payerdocs.developerhub.io/payer-docs/creating-an-order#approvedeny-order
](https://payerdocs.developerhub.io/payer-docs/creating-an-order#approvedeny-order)
and an invoice should be created
https://payerdocs.developerhub.io/payer-docs/creating-an-invoice
You can also wait with approving the order and (if applicable) capturing the card payment while your order is being processed, if you for example need to change the Order due to items out of stock or if you don't ship and deliver the goods right away.
The card payment will still be authorized and you can capture the amount (or a lower amount) later in time. There is also support for partial captures. See detailed documentation for respective payment method for more information.