This is the integration flow for storing cards and capture payments on a recurring or unscheduled basis, using the Card Payment Widget.
Complete API documentation is available at: Payer B2B
Recurring card payments are only supported for Visa and Mastercard
Integration Flow
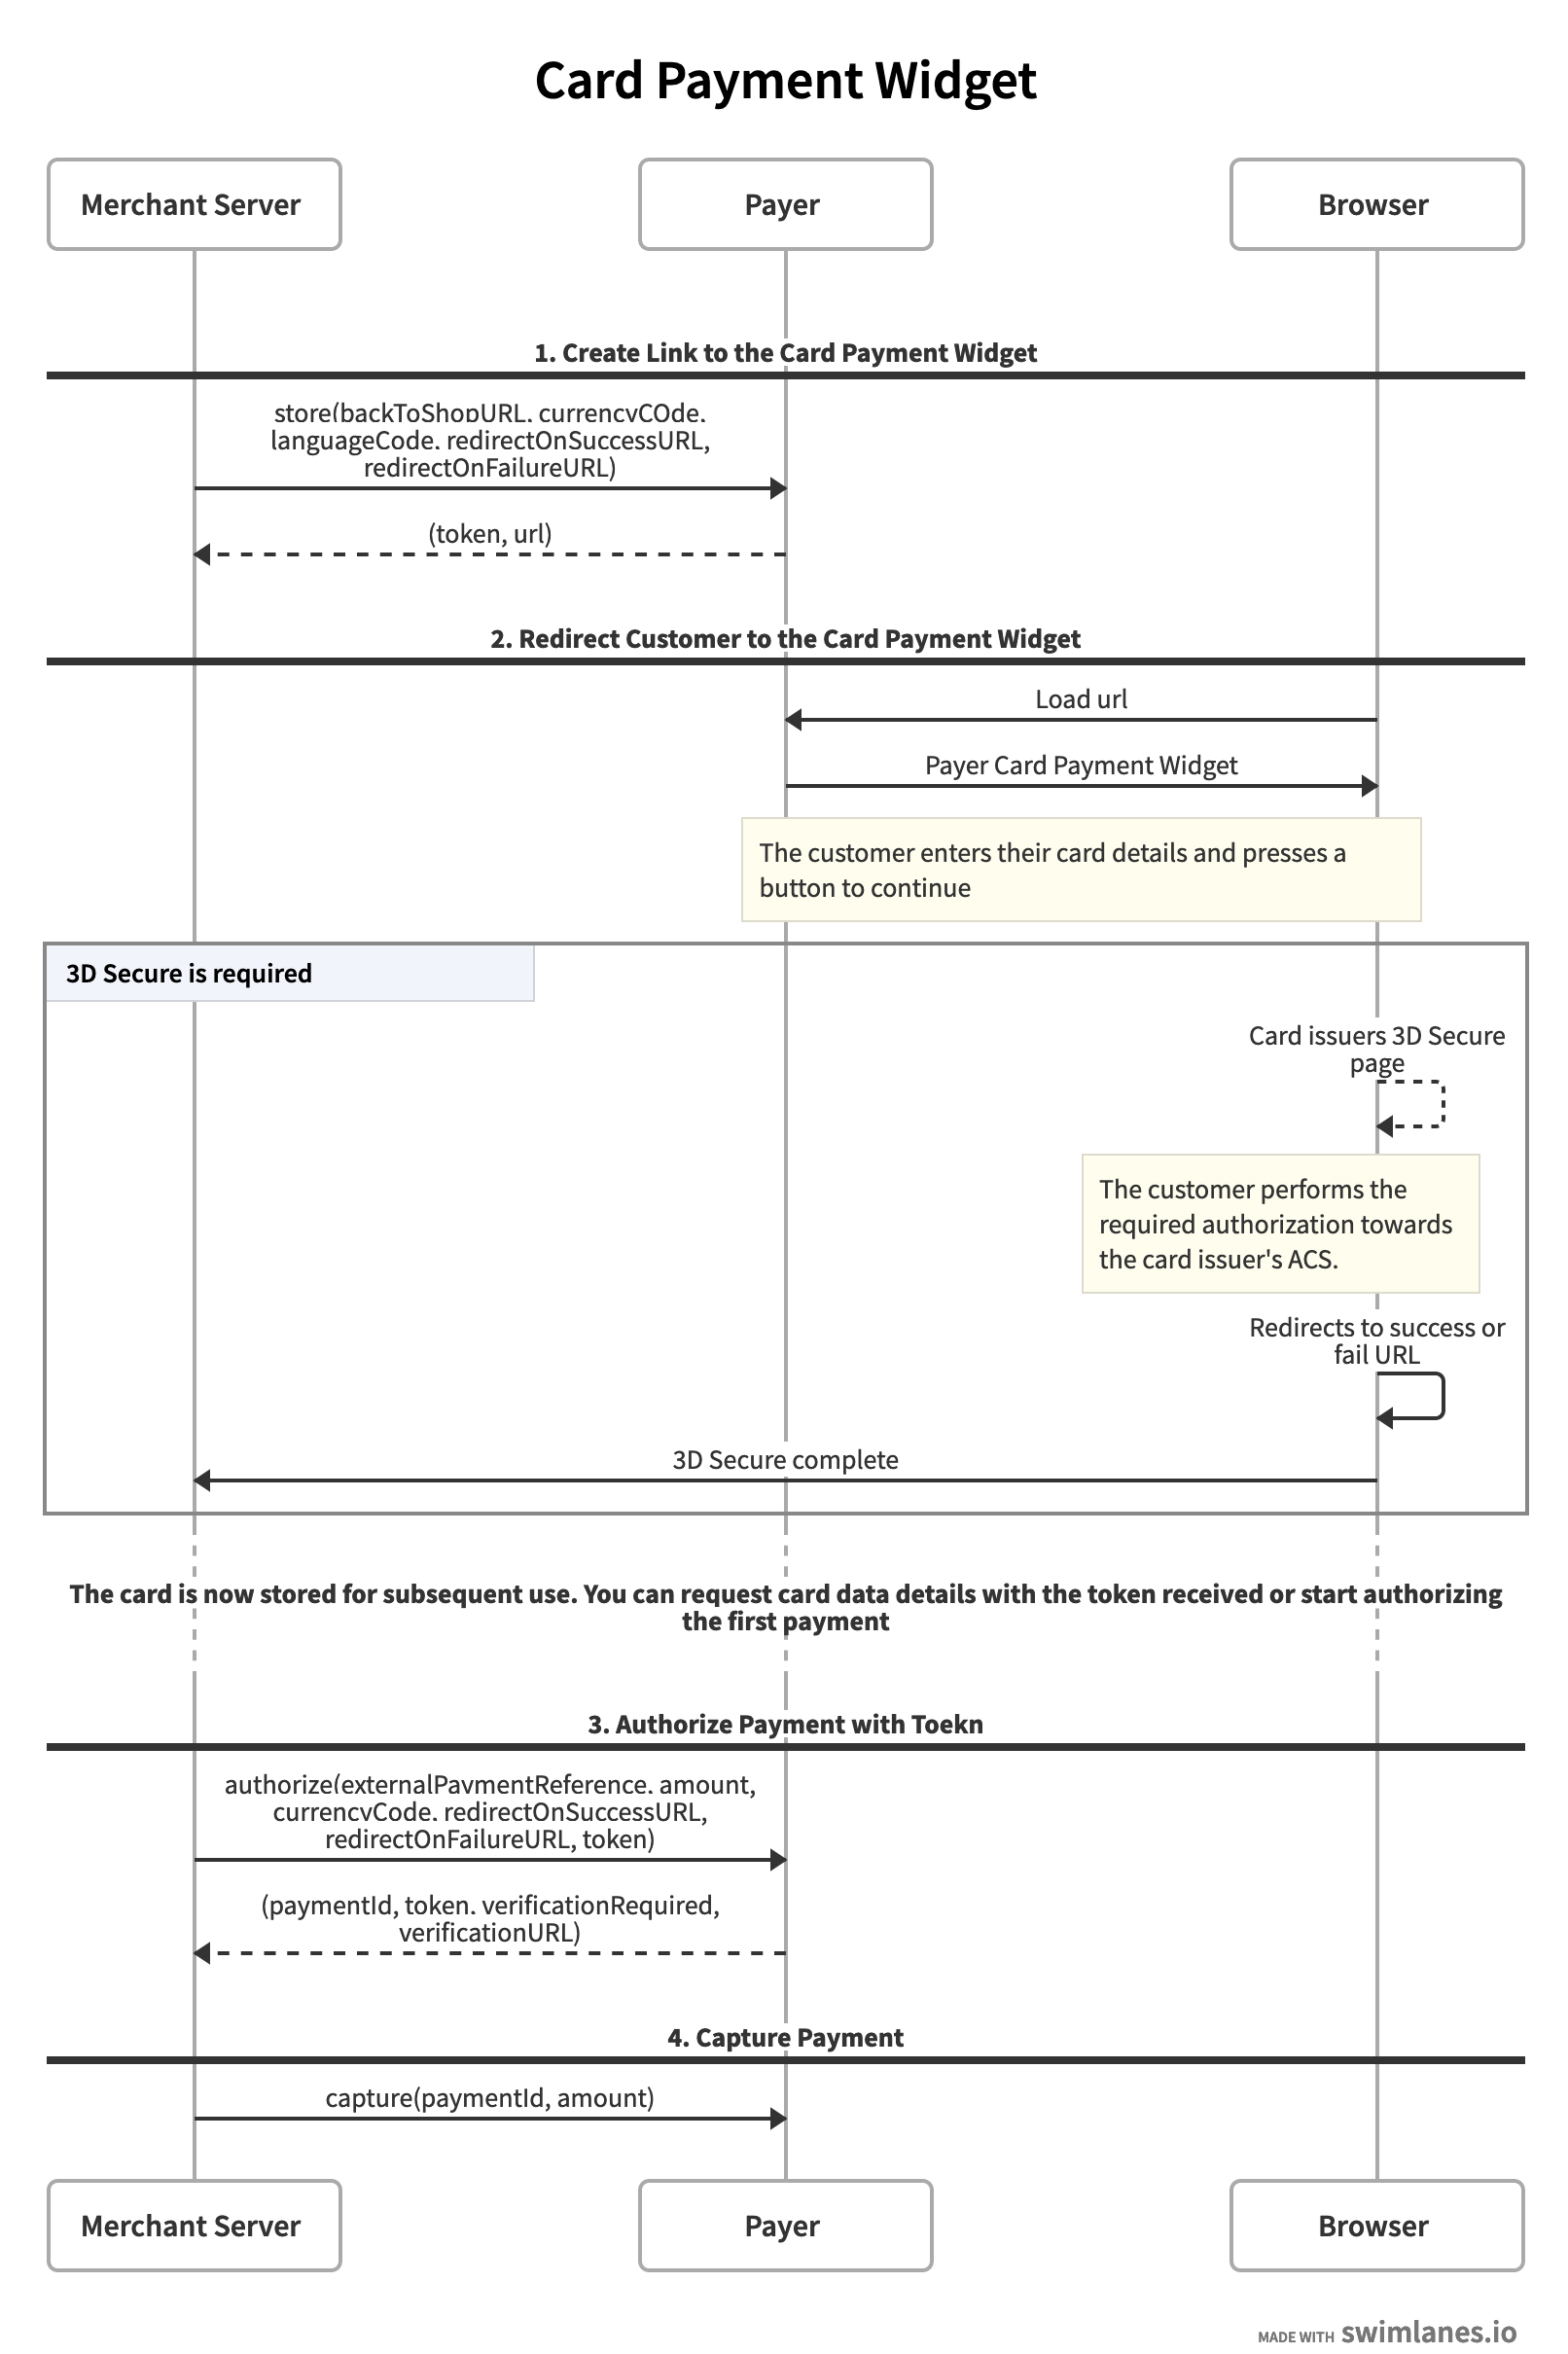
The following flow describes the communication between the customer's browser, the merchant server and Payer.
Integration Guide
Step 1. Create link to the Card Payment Widget
The first step is to request a link for storing the card payment. Payer will request card information from the customer and handle a potential 3d-secure verification for the customer.
The response contains a url used for redirect or loading in iframe and a token for requesting status and authorizing the card payment.
Step 2. Present card input to the user
Integration guides: Card Integration Alternatives
In this step Payer will request card information from the customer and handle a potential 3d-secure verification.
Step 3. Authorize payment and subsequent payments
Use the token to make a request to authorize a payment. Make sure the status of the token is READY before using it to authorize. Status check can be done using this endpoint.
This call should not be done from the browser, since it requires the merchant’s private credentials.
Include the type of subsequent payments that you have consent from the Buyer to initiate and how they will be initiated. Contact Payer if you are unsure about what type of stored card payments you have in your flow and your agreement.
The response contains a paymentId that can be used later to capture the card payment and also information about if 3-D Secure verification is required (note that 3d-secure might already been performed the previous step, the first time a card is stored). verificationUrl is always provided if verification is required.
Depending on the type of stored payment consent, way of initiation and amount - a 3D Secure verification might be required.
If 3d-secure is required and Buyer is actively involved in the session - > Redirect the browser to verificationURL as in Step 3 above.
If 3d-secure is required and Buyer is not currently in the session - > Call for the Buyer’s attention to initiate a session and Redirect the browser to verificationURL as in Step 3 above.
If 3d-secure is not required, continue to Step 4.
Consult Payer for more information about the different stored payments types to use and for which secenarios a 3d-secure could be required in subsequent payments.
Step 4. Capture Funds
Use the paymentId acquired in the authorize request to capture the card payment. It is possible capture an amount that is less than or equal to the authorized amount. The entire or remaining authorized amount will be captured if no amount is provided.
This call should not be done from the browser, since it requires the merchant’s private credentials.
The capture request will return a response containing URLs to the receipt view. These will always be null if you don’t connect the payment to an order created in Orders V2 and included in previous request (“Step 3: Authorize payment and subsequent payments”)
Ready for testing your integration
In Testing & Simulation page you can find cards for different test scenarios.